Apple Pastry (Pirog)

In the Russian community I grew up in we called our sweet and savory sheets of yeast dough baked and filled with fruit or cabbage or meat, Pirog пиро́г (make sure to roll the r when you pronounce it).

This recipe will make enough dough for 2 small cookie sheet sized pastries. You can cut the recipe in half if you aren't feeding a crowd or giving some away.

Dough:
1/2 cup warm water
2 packages yeast (each packet is approx. 2-1/4 teaspoons yeast)
1 tablespoon sugar
2 cups sour cream
1/2 cup soft butter
1 cup sugar
2 eggs
2 teaspoons salt
about 6 cups flour

Preheat oven to 350 degrees.
Dissolve yeast in warm water with the 1 tablespoon sugar.
Warm the sour cream carefully to lukewarm.
Mix the sour cream, butter, sugar, eggs, salt, and yeast mixture.
Start adding the flour 1 cup at a time till all mixed in and your dough comes away from the bowl and starts to form a ball. You might need a little more than 6 cups of flour.
Knead the dough on a floured surface.
Place the dough in a bowl in a warm place away from draft and let it rise twice punching in between rises. This could take up to 2 hours.
Divide the dough in half. Work with one half at a time if you are filling 2 small cookie sheets.
On a floured board or surface roll the dough out to the size of your small cookie sheet (approx. 15-1/2 x 10-1/2 x 1) The dough should be 1/4-1/2 inch thickness.
Carefully transfer the dough to the prepared cookie sheet (greased) and pat the dough down to fit to the edges and up the edges.
Fill the prepared dough with your choice of filling.
Bake in 350 degree oven for approx 40 minutes or until dough is a golden brown.
Cool before cutting in small portions and serving.

Filling:
4 cups fruit - fresh, previously frozen, or canned
1 cup sugar
4 Tablespoons corn starch 

Bring all the ingredients to a boil and then let cool before spreading evenly over the dough.
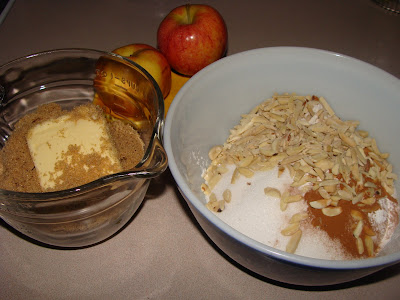
I added nuts on top of the filling but that is optional.
I used apple slices that I chopped into bite sized pieces.
*This filling recipe was enough for one cookie sheet of the dough. Double it if making 2 cookie sheets.


I had some roasted pecans and decided to sprinkle them on top before baking the Pirog пиро́г.
 The finished product. I'm a novice at baking with yeast doughs and kneading dough but slowly but surely I'm practicing my way into a comfort zone to try these recipes my mom made for larger gatherings. I'll share some of her savory Pirog recipes in the future using a slightly different dough recipe. My mom's Pirog usually had another layer of dough on top of the filling that was pinched to the bottom layer of dough. Then you would cut decorative slits on the upper dough before baking. Stay tuned for that method with a savory filling.

Hot Rueben Spread


If you need another idea for a cracker spread this season you should try this recipe. If you like rueben sandwiches you will love this dip! It's a delicious spread for crackers or breads of your choice. I could make a meal of this. And I did!
  • 1 cup of canned corn beef, chopped
  • 1 3/4 cups sauerkraut, drained and patted dry
  • 1 cup swiss cheese, grated
  • 1/2 cup mayonnaise
  • 1/2 cup sour cream
  • 1 tablespoon dijon mustard
  • 1 tablespoon ketchup
  • 2 tablespoons pickle relish or pickles, chopped
  • Dash of pepper
  • 3 drops Tabasco sauce..or more if you like 'heat'
  • Extra swiss cheese, grated (for the top)
  1. Combine all ingredients and spread into a greased oven safe dish. (approx 1 litre size)
  2. Sprinkle extra cheese on top.
  3. Bake at 350º for 25 - 30 minutes until mixture is hot and bubbly.
  4. Serve hot with crackers or bread. 

Lopsha - Russian Noodle Soup Flashback Friday

For Flashback Friday I'm re posting this peasant soup that we grew up with called Lopsha in Russian at our house and in our Russian community.
This soup (Lopsha) is made is made for large church gatherings. I have recipes to serve 200-250 people. They make their own noodles using 20 dozen eggs, 60 lbs. flour and 1 lb. salt, then make a stock from 35 lbs. of soup bones and 350 lbs of choice (kosher) beef. Usually Lopsha is served at funerals and Borscht is made for Weddings. This is basic Russian Peasant Village Fare. I’m giving you a very simple quick recipe.


All you’ll need is store bought (or home made) Chicken Broth and Jewish very fine egg noodles. (Manischewitz or similar)

Bring the Broth to a boil.

Add as many noodles as you like, but remember they expand while cooking. When the noodles are cooked the Lopsha is ready. Adjust your noodles as to how thick you like your Lopsha. If your soup gets too thick for your liking just add some more broth.

If you want a little more interest in the soup you can add cubed potatoes and carrots to the broth to cook them before you add the noodles. If you want those carrots and potatoes to be a lot tastier saute them in a little olive oil, salt and pepper before you add them to the broth. Happy memories!


After all our holiday eating of rich foods this would be a nice meal.

Ginger Spice Cookies

Here we are, December 24th. You may still be needing to bake something sweet. This recipe is one that calls for basic pantry items, but the wonderful aroma from the spices will fill your home with an invitation to the kitchen, and after all isn't that where we all love to gather during the holiday season!

  • 1 cup butter
  • 1 large egg
  • 1/2 cup white sugar
  • 1/2 cup brown sugar
  • 1/3 cup molasses
  • 2 1/3 cups flour
  • 2 tsp baking soda
  • 2 tsp ground ginger
  • 1/2 tsp cloves
  • 1 tsp cinnamon
  • 1/2 tsp finely ground black pepper (this is a must in these cookies)
  • 1/4 tsp salt
  • 1/2 cup cane sugar, for rolling dough in
  1. Cream butter. Add egg and beat. 
  2. Add both white and brown sugar and beat well. Add molasses and beat well.
  3. Measure all the remaining dry ingredients (except cane sure for rolling) into a large bowl and stir mix well.
  4. Add dry mixture into creamed butter mixture and mix until dry ingredients are blended in well and dough comes together.
  5. Cover dough and refrigerate for at least 1 hour or up to 12 hours. 
  6. Roll dough into 1" balls, roll in cane sugar and place on parchment lined baking sheets.
  7. Bake in 350º oven and bake for 10-12 minutes.
  8. Remove to cooling rack to cool. Store in air tight container. 

Homemade Vanilla Extract

Making vanilla extract couldn't be easier!  
All you need are two ingredients...vanilla beans and alcohol.


Pure homemade vanilla extract smells heavenly...
adds intense flavour to baked goods...
and makes a fun little gift from the kitchen.


  • 12 Vanilla Beans 
  • 2 cups vodka 
 Rule of thumb ~ use six beans per 1 cup of alcohol.  (Never less.  More is better!)

Directions:
  1. Split each bean in half lengthwise using a sharp knife or a pizza cutter.  Leave an inch connected at each end of the bean.  (Just because.  For looks!)
  2. Place the beans in a clean jar.  Cover them with vodka to submerge completely.  Place the lid on the jar and give it a little shake.
  3. Put the date on the lid...just so you know how long it has been steeping.
  4. Store the jar in a cool, dark place for several months.  Shake occasionally.The longer you wait, the richer it is.
  5. Strain the infusion through a coffee filter to remove the flecks of seed.  Or, leave them if you prefer.
  6. Decant the extract into pretty bottles for gift-giving...using a funnel.
  7. Add more vodka to the 'spent' vanilla beans in the jar and make more vanilla!  Eventually the beans will need to be replaced...once all the flavour has been extracted.  I left the 'used' beans in the jar and added fresh ones as well.
Vanilla happens to be among the most expensive spices, since growing the seed pods is very labour intensive.  I ordered Madagascar beans on-line.  As for the vodka, I used the least expensive kind I could find.   Vodka is the preferred alcohol since it is virtually flavourless.

And that is the synopsis of my first foray into making vanilla extract.  The vanilla has been packaged and gifted...and the next batch is steeping in a dark corner of my pantry.  I thought I would share my experience with you now...to give you plenty of time to get your vanilla extract production going before next year's gift-giving season is upon us.


Nuts and Bolts with Bugles

Those cute little crunchy horn shaped bugles add a nice crunch to this old stand by party mix that I'm sure most of you have a number of recipes for. Bugles may be a new addition for you. I make a huge roaster full early in the holiday season, bag it and put it in the freezer. They stay crisp and fresh for a long time that way. This mix makes a really nice gift in a tin. 
  • 6 cups Shreddies (These are a Canadian cereal. They are denser and not as light tasting as Chex. If you can't find Shreddies use equal amounts of more Chex cereal)
  • 6 cups Cheerios
  • 10 cups Rice or Corn Chex, or a combination
  • 6 cups pretzels
  • 6 cups bugles
  • 6 cups peanuts ( I leave these out to make a peanut free snack option, but the addition of nuts is always nice)
  • 1 cup butter
  • 2 tbsp Worcestershire sauce
  • 1 tsp onion powder
  • 2 tsp garlic salt
  • 2 tsp seasoning salt
  1. Measure all dry cereal, bugles and pretzels into a large roasting pan. Make sure it's big enough so you can stir it easily during baking.
  2. Melt butter and stir in spices.
  3. Drizzle butter/spice mixture over dry ingredients, stirring to coat.
  4. Bake in 250º oven for 1 1/2 hours. Set timer and stir mixture every 20 minutes. 
  5. As the mixture cools it will crisp up. Once cooled bag and store in dry cool place or in freezer. Make sure you use freezer bags to insure they are airtight. 


Melting Shortbread Cookies Gluten Free


Many years ago, I was visiting my parents and my dad mentioned that the lady,  for whom he was doing  some work,  had  brought him a treat for coffee time - shortbread and coffee.  He mentioned several times how this was the best shortbread he had ever had, that it melted in his mouth.
That became my standard for shortbread - did it melt in my mouth?
Always enjoying shortbread, I wanted a gluten free recipe in time for the holiday season.
This one works really well and passes the shortbread test - Does it melt in your mouth?  YES, it does!
  • 3/4 cup butter - or half butter/half margarine
  • 1/2cup icing sugar 
  • 1 1/2 cups  Julie's Flour Mix  (gluten free) 
  • 3/4 tsp xanthan gum 
  • 1 tsp vanilla 
  • glazed red and green cherries
  1. Soften butter to room temperature. 
  2. Combine butter and icing sugar in mixer bowl - then beat until butter is white 
  3. Add flour mixed with xanthan gum - blend into butter/sugar
  4. Beat on high for at least 6 minutes. 
  5. Chill in refrigerator for a few minutes - or longer. 
  6. Drop by scant teaspoon onto parchment lined cookie sheet, top with cherries cut in half. 
  7. Bake at 300 degrees for 10-11 minutes  or until the edges begin to hint of turning golden. 
  8. Let cool completely before removing from pan - I slide the parchment paper onto a cooling rack to free up the pan for the next cookies. 
* These can also be baked in a cake pan with cherries even spaced to allow pieces cut in 1" squares. It is hard to keep the cherries centred on the cookies, the batter is very soft and the cherries want to slide as they bake.


Caramel Apple Pudding - Flashback Friday


Tonight it's cold in BC and the rain is pelting down.  
It's the perfect night for this yummy apple pudding.  
Apples and almonds are nestled in a cinnamon flavoured pudding
 surrounded by warm caramel sauce. 
Add a scoop of ice cream and you have the ultimate comfort food dessert.
Pudding:
  • 3/4 cup flour
  • 1/2 cup sugar
  • 1 tsp. baking powder
  • 1 tsp. cinnamon
  • 1/4 tsp. salt
  • 1/2 cup milk
  • 1 1/2 cups chopped apple (about 1/4 " size pieces)
  • 1/2 cup slivered almonds (these add more crunch than the sliced almonds)
Sauce:
  • 3/4 cup packed brown sugar
  • 1/4 cup butter
  • 3/4 cup boiling water
  1. In mixing bowl, combine flour, sugar, baking powder, and cinnamon.
  2. Add milk, stir with a spoon until blended and then add apples and almonds.
  3. Spread in a 1 1/2 quart casserole dish that you have buttered on the bottom only.
  4. Mix sauce ingredients and stir until butter is melted.
  5. Pour gently over pudding.
  6. Bake at 375 degrees for 40-50 minutes or until top starts to brown. If you over bake it, you will have less sauce.


When you dish it out, you will find the caramel sauce on the bottom. Serve warm with ice cream.
*To make it ahead, assemble the dry ingredients of the pudding and the sauce and set them aside until you are ready to bake it. Then add the milk to the pudding and the hot water to the sauce, assemble and bake.

Gingerbread Cookies


Gingerbread cookies are always a hit with the younger crowd although I sure don't mind one with my coffee either! I used to bake these cookies when our children were younger and then later for the grandchildren. I thought it was time to bring back some memories. These cookies are easy and fun to make.  As you place the cut dough on the pan you can move the body parts to give them a whimsical look. And decorate as elaborate or as plain as you want. I am not a 'fancy decorator' as can be seen in these photos..but they make me smile anyway. These cookies are 'soft and chewy'. If you want crispy cookies roll the dough thinner, and bake a little longer.

  • 3/4 cup butter, softened
  • 2/3 cup brown sugar
  • 2/3 cup molasses
  • 2 tablespoons milk
  • 1 teaspoon vanilla
  • 3 cups flour
  • 1 teaspoon baking soda
  • 3 teaspoons cinnamon
  • 3 teaspoons ginger
  • 1/2 teaspoon nutmeg
  • 1/2 teaspoon salt
  1. Combine butter, brown sugar, molasses, milk, and vanilla. Mix until smooth.
  2. Whisk together dry ingredients and stir into the wet ingredients until well combined and dough forms into a ball.
  3. Wrap up in waxed or parchment paper and refrigerate overnight.
  4. Roll out dough ( approx 1/4" ) on very lightly floured parchment paper, cut into gingerbread shapes. I used approx a 5" cutter.
  5. Place on parchment lined cookie sheet and bake at 350º for 10-12 minutes. 
  6. Cool completely and decorate with your favorite icing. Allow to dry before packing into cellophane bags for gifts or into containers for freezing. I like to lay the cookies on a cookie sheet to freeze, once frozen they can be packed into containers for freezing without messing up the decorating.
  7. Yields: 20 cookies

Mac & Cheese Salad

This macaroni salad can be served hot or cold and it can also be kicked up by adding cooked and seasoned ground beef to make a more hearty meal.

  1. 16 ounces of small elbow macaroni cooked in well salted water
  2. 5 ounces of crumbled feta cheese
  3. 4 ounces grated fresh Parmesan cheese
  4. 1/2 cup or more of fresh baby spinach julienned
  5. 3 green onions chopped
  6. Olive oil
  7. Salt and Pepper to taste

  • Bring a big pot of water to boil with a good amount of salt. 
  • Add the elbow macaroni and cook to a nice al dente stage.
  • Drain water and add a little olive oil to slightly coat the elbow macaroni.
  • Immediately add the feta and Parmesan cheese while macaroni is still hot.
  • Add green onions and spinach.
  • Add salt and pepper to taste.
  • Toss and serve hot or you can refrigerate to serve cold at a later time.


If you want a more hearty meal instead of a nice side dish add some cooked seasoned ground beef to the salad and top with a little more Parmesan cheese. If you want the dish to be cheesier just add more feta and Parmesan cheese. You can also add more green onions or spinach. It's up to you and your taste buds.

Cranberry Pistachio Trees


I was intrigued by this recipe from Canadian Living in the November 2013 issue. A shortbread cookie laden with cranberries and pistachios. I really like that it's not very sweet at all and just looks so beautiful, you have to take one and then one more. Although I've pretty well copied the simple ingredients, the method is slightly tweaked for the way it worked best for me.

Ingredients:
  • 3 cups pistachios with shell on
  • 1 cup butter, softened
  • 3/4 cup icing sugar
  • 1 tsp vanilla
  • 1 tsp almond extract
  • 2 cups flour
  • 1 cup dried cranberries, chopped
  • 1 egg white, for egg wash dip

Method:


Most of the work has to do with preparing the nuts. I love how pistachios are so easy to crack, even if it takes a bit of time.
  • shell enough nuts to fill 1 - 1 1/2 cups
  • place in a pot of boiling water and allow to boil for 1 minute. Drain and rinse with cold water
  • use a tea towel to loosen the brown skins and slip them off by hand. It's the beautiful bright green nuts that you want for these cookies and it's okay that they are slightly moist, because it protects them from toasting and turning brown while baking.
  • Coarsely chop, using a food processor or nut grinder. Set aside.
  1. In a mixing bowl, using wooden spoon, beat together butter, icing sugar, vanilla and almond extract until light and fluffy.
  2. Stir in chopped cranberries
  3. Stir in flour until well combined. 
  4. Divide into three parts and roll each into a 4 - 5 inch log. Wrap tightly with saran wrap and place in fridge for 15 minutes.
  5. Remove from fridge and, with wrap still on, shape into a triangle by pounding the sides on the counter. Shape as needed. Unwrap.
  6. Roll first in whisked egg white, then in nuts, pressing nuts on to cover all three sides.
  7. Re-wrap and place in fridge for 15 minutes or longer to set. Preheat oven to 325 F.
  8. Cut into 1/4 inch thin slices and place on parchment lined cookie sheets. Bake 18 - 20 minutes, until edges just lightly begin to look golden.  Let cool on cookie sheets before removing. Yields 3 1/2 - 4 dozen.  These freeze well.


Apple Pear Crisp

Warm fruit crisps are the perfect dessert for cool early winter nights. While I love baking pies, a crisp is a 'quick pie'.
  • 6 cups of a combination of peeled and chopped apples and pears
  • 3 tbsp butter
  • 1/2 cup honey
  • 2 tsp cinnamon
  • 3 tbsp flour
  1. Wash, peel and chop fruit.
  2. Melt together butter and honey. Pour over fruit and stir to coat.
  3. Stir together cinnamon and flour. Stir into fruit until fruit is coated.
  4. Place this mixture into a well buttered pie plate.
Crumble Topping:
  • 3/4 cup quick oats
  • 1/4 cup flour
  • 1/3 cup brown sugar
  • 1 tsp cinnamon
  • 1/2 cup butter
  1. Stir together dry ingredients.
  2. Using a pastry blender cut in butter until the size of peas.
  3. Sprinkle over fruit mixture.
  4. Bake in 375º oven for 35-40 minutes, or until fruit is tender when poked and juices are bubbling, and crumble is golden crisp.


Rice Rolls with Peanut Sauce / gluten free

I love these rolls. They are easy to make and can be served as an appetizer or as a side to a good bowl of asian soup.
The quantity depends totally on how many you want to make, just adjust the amounts of filling accordingly. I will give you the ingredient list I used. I made the entire package of rice rolls for a larger gathering but you certainly can make it in smaller amounts as well.

You need:

  • 1 package of rice roll wraps found on the shelf in the asian section of your grocery store.  They come in two sizes, but I prefer the large ones, it is easier to work with
  • bowl of water for dipping the rice wraps
Filling options:
  •  shredded chicken or cooked shrimp (optional)
  • cucumbers, julienned
  • carrots, julienned 
  • red peppers, julienned
  • Rice Vermicelli, cooked
  • green onion, cut diagonally in 1/4"-1/2" slices
  • bean sprouts
  • cilantro leaves or parsley


  1. Dip the dry rice wraps into water for a few seconds to soften
  2. Lay on a large plate.
  3. Fill with small amounts of filling.


      4. Tuck in two sides and roll the opposite sides together.


          5. Try to roll them tighter than in this picture. It holds together better.


Serve with the following dipping sauce.

Gluten Free Dipping Sauce-

  • 1/2 cup natural peanut butter
  • 1/4 cup rice vinegar or lime juice
  • 3 tablespoons gluten free soya sauce (in Canada VH brand)
  • 1 tablespoon fish sauce
  • 2 tablespoons brown sugar or honey 
  • 1 teaspoon asian garlic chili paste called sriracha (1/2 teaspoon chili flakes work fine if you don't have sriracha)
  • 1 teaspoon grated fresh ginger
  • 1 garlic clove, minced
  • 2 tablespoons water or lite coconut milk
Peanut Dipping Sauce 2, NOT gluten free :
From the Thai Pizza posted earlier
  • 1/2 cup natural peanut butter (regular is fine too)
  • 1/2 cup hoisin sauce
  • 1 tablespoon honey
  • 2 teaspoons rice vinegar
  • 2 teaspoons of fresh ginger, minced
  • 2 garlic, minced 
  • 2 tablespoon sesame oil
  • 1 tablespoon soya sauce
  • 1 teaspoon sriracha (asian garlic chili sauce) or chili flakes
  • 1 tablespoon oyster sauce
  • 2-3 tablespoons water


A Few Great Gadgets from Judy's Kitchen...

It's Saturday...a good day to share a few kitchen tips and tricks.

There's nothing sweet about opening the container of brown sugar and finding a rock-hard mass that requires a pick to break it apart.  Some years ago, I was told to put a slice of apple in the container of brown sugar to keep it soft.  That works...but after awhile the brown sugar tastes a little like apples.  Earlier this year, while snooping around in a kitchen shop in Barkerville, B.C. I found a little 'brown sugar disc'...guaranteed to keep sugar soft! 


I have been testing it for some time now...and it does the job well!  No more hard lumps of sugar on our porridge.   Simply soak the clay disc for 15 minutes and pat dry.  Add to the brown sugar, which is best stored in a sealed container. Mine can be found in a yellow Tupperware container from ages past!  Enjoy soft, lump-free brown sugar for months!

Something else that I quite like are the silicone lids that I picked up at the 'street fair' in Palm Springs last year. Since then I have seen them at kitchen shops in various shapes and sizes....and also found some that are stretchy and made to fit over everything from a juice glass to a half a watermelon.


Also called 'splatter guards'...they are perfect for topping your bowl before it goes in the microwave.  No more covering of dishes with plastic wrap and burning one's fingers when trying to remove it.  They seal on all smooth rims and create airtight seals for reheating and storing in the fridge. My set has five sizes...which nest for easy storage.  I recommend them! 

If you have a favorite kitchen gadget that you would like to tell us about...or a kitchen tip or trick to share...today is a good day for that.  Leave us a comment with your tip.  If you do...you will have entered your name in the draw for a brown sugar disc.   I will publish the winner's name right here at the end of this post on Monday, November 24th.

* * * * *

Thanks to all of you who shared your favorite gadgets and kitchen tips.  There are several that I plan to check out soon!  And the winner is....Elsemieke Wishart. Please leave your contact info in the comment section, and I will get your brown sugar disc out to you shortly!